Table Saw Makeover
Learn how to clean, restore, and maintain your table saw's surface. Remove rust, grime, and buildup to improve performance and safety in your workshop.
If your table saw doubles as a workbench, assembly table, or sanding station, you're not alone—especially in a compact workshop. Over time, heavy use can leave your saw's surface covered in dried glue, finish residue, scratches, and even rust. While these blemishes might seem cosmetic, they can interfere with your woodworking. Rough or dirty surfaces can scratch your workpieces, reduce accuracy, and cause unwanted friction during cuts.
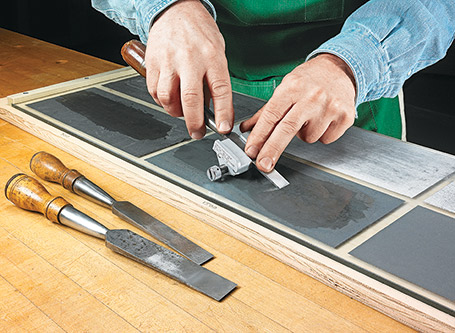
In this step-by-step article, you’ll learn a straightforward, effective process to clean and restore your cast iron table saw top. From removing rust to polishing the surface for smooth material movement, this makeover improves both performance and appearance. A little maintenance not only makes your saw safer and easier to use but also extends its life—making it a key part of your woodworking success.
Whether you’re a seasoned woodworker or a DIY enthusiast, this table saw maintenance guide will help you get the most out of one of your shop’s most important tools.
SELECT YOUR PLAN PACKAGE
What You Get:
- 3 pages of step-by-step instructions
- 9 full-color photos, illustrations and exploded views
- Detailed instruction for getting great results
- Materials list and cutting diagram
- Retail sources for hardware and supplies
Product Recommendations
We don't have any links to project supplies and hardware for this particular project yet, but here are some other products that might be of interest to you. (We may receive commission when you use our affiliate links. However, this does not impact our recommendations.)

Similar Woodsmith Plans

Imperial Plans
The United States Customary System of Units (USCS or USC), more commonly referred to as the English or Imperial system, is the standard set of units for our plans. It uses inches and feet for measurement. This is the one you probably want if you are in the United States, and it is the one we have traditionally offered on this website.

Metric Plans
The International System of Units (SI), more commonly referred to as the metric system, is the alternative set of units that we have available for some of our plans. It uses millimeters, centimeters, and meters for measurement. This is the one you probably want if you are outside the United States. These plans are provided by our business partner, Australian Woodsmith, and are based on the original Woodsmith plan. However, dimensions and other elements of the plan may vary between the metric and standard versions. Be sure to double-check the plan before building.


Premium Plans
All of the information that you need to build our plans can be found in the standard plan. However, if you want even more granular detail to make your job easier, you should consider our premium plans. These come with additional shop diagrams that we drew when creating the prototypes. Shop drawings are not available for every plan.

Gift Plans
We have added the ability to buy plans as gifts for other people. If you enter someone's email address into the gift recipient email box, when you complete your purchase, that plan will be emailed to the recipient you indicated instead of to yourself.
The same plan cannot be purchased for multiple people in the same order. If you are ordering the same plan for multiple people, please place separate orders for each. This is due to the fact that we have built our site with the restriction of 1 product in the cart at any given time, in order to protect people from accidentally placing duplicate orders.
In order to reduce spam emails generated by bots who would purchase and send unsolicited plans to random people, we have restricted gift purchase recipients to people who are already registered on the site. If you wish to purchase a plan as a gift for someone you know, please confirm that they have registered on the site beforehand. For this same reason, free plans cannot be gifted. Otherwise, bots would constantly purchase free plans for random people, who would receive unsolicited emails from us.
There is no need to worry about accidentally buying a duplicate plan for someone who already owns it. If your intended recipient already owns the plan, you will not be able to add it to your cart for them.
If you receive an email that claims to be for a gift plan from someone, please check to ensure that the "from" domain is woodsmithplans.com. Please also check with the person who bought the plan for you, to ensure that it is a legitimate email. Do not open unsolicited email attachments without verifying the email's source first. If you purchase a plan as a gift for someone else, please inform them of this purchase independently so they know to expect the email from us.


